|
This mask was designed after much research on the internet.
I found many reference photos and used them all to develop a mask, using materials I already had.
- Paper or plastic sheet to protect work area
- Disposable gloves (optional)
- Aluminium foil
- Newspaper
torn into strips
- PVA glue
- Water for diluting the glue
- Container
with cover, for storing the diluted glue between drying of layers
|
- Large paint brush to assist with applying the glue (optional)
- Netting
- 1/4" wide elastic (I used black)
- Waxed twine
- White emulsion paint
- Red acrylic craft paint
- Silver acrylic craft
paint
- Black acrylic craft paint
- Silver roller gel pen
|
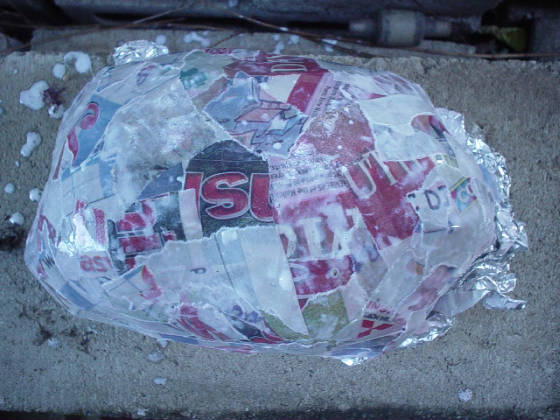
I pressed several sheets of aluminium foil on to my nephew's
face, to get the general size and shape. I covered the outside (very gently so that I wouldn't lose the shape) with
three layers of newspaper soaked in watered-down PVA glue, letting each layer dry before proceeding to the next.
| Layer 1 in process |

|
| Layer 2 |
|
| Layer 3 |

|
|
 |
|
|
|
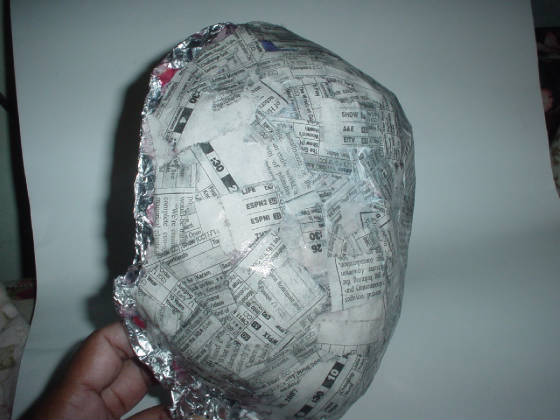
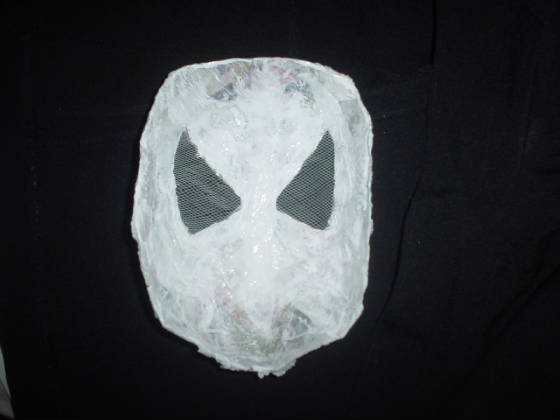
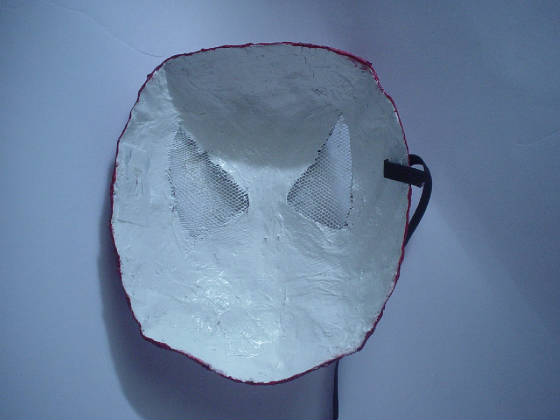
With the last layer dried and rigid, I removed the aluminium
foil and covered the inside of the mask with three layers of the newspaper and PVA glue.
You can see the general
placement of the nose and eyes from the picture below.
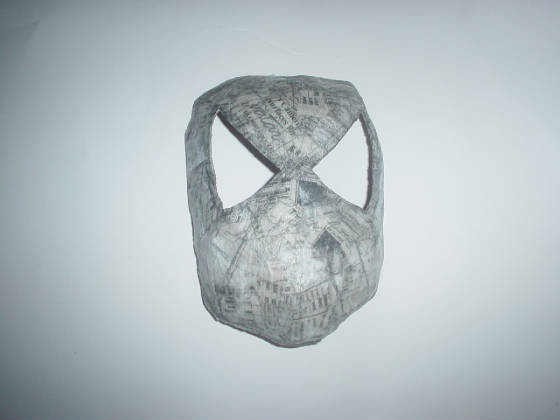
I then marked off the area for the eye-hole
and very carefully cut it out with a craft knife.
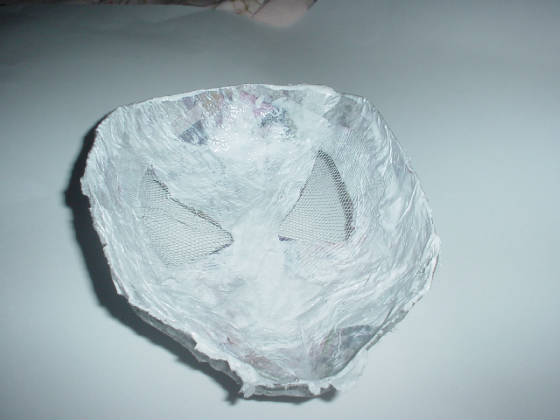
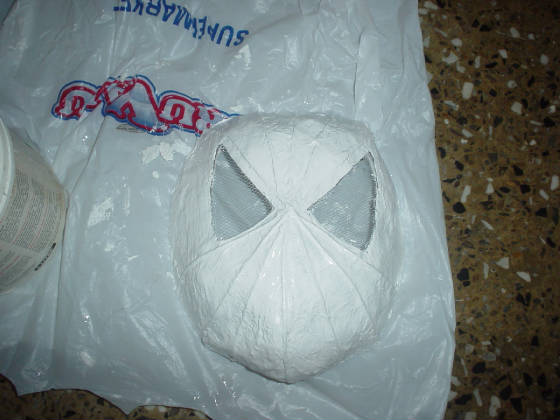
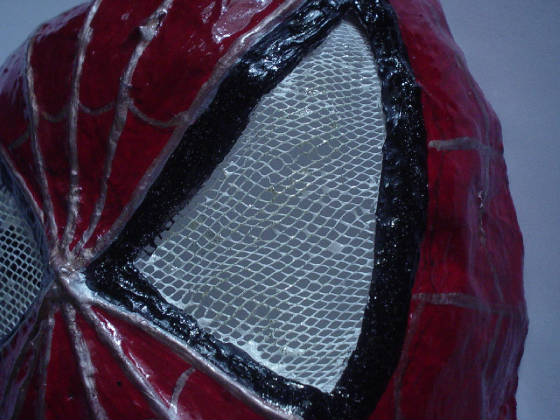
I cut two pieces of an old mosquito net a little larger than
the size of the eye-holes, centred the pieces over the holes on the inside of the mask and stuck down the edges that overlapped
on the mask with PVA glue.
I then stabilised the net with a wash of PVA glue on the inside and outside.
After that dried, I added one more wash of PVA glue to the entire mask and let that dry.
| Inside after the net has been added |
|
|
|
|
| The front of the mask with the net |
|
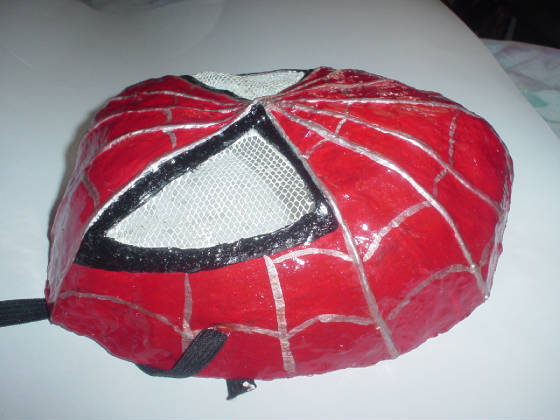
Once the mask was dry, I cut the excess paper off the edges
of the mask to neaten it. It was time to create the web.
I cut six (6) lengths of waxed twine,
applied glue and criss-crossed five (5) of them over middle nose area of the mask.
I laid the
first one down the centre of the mask starting at the centre of the forehead, straight down to the centre of the chin. I
added two to either side.
The sixth piece was cut in two and placed just below the eye-holes on either
side. I started at the side and carried it up to the centre.
The nice thing about the using the
waxed twine was that it stuck to itself, it was sturdy and stayed in place so that I was able to glue it down without it shifting.
| Waxed twine in place |

|

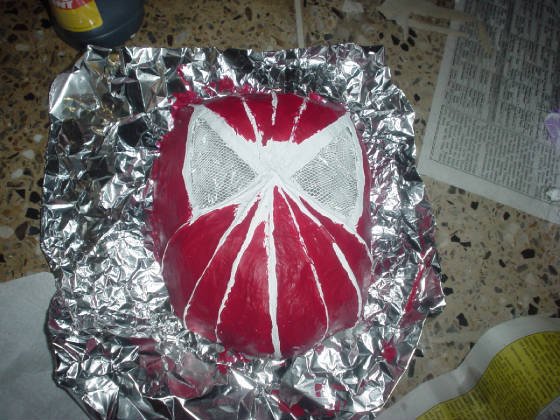
At last, it's time to paint!
I applied two coats
of white emulsion paint (for walls) to the front and back. This dried quickly so that I could move on to my acrylic
paint.
I applied the first coat of red acrylic paint, leaving the web
and the area around the eye-holes white.
|
|
|
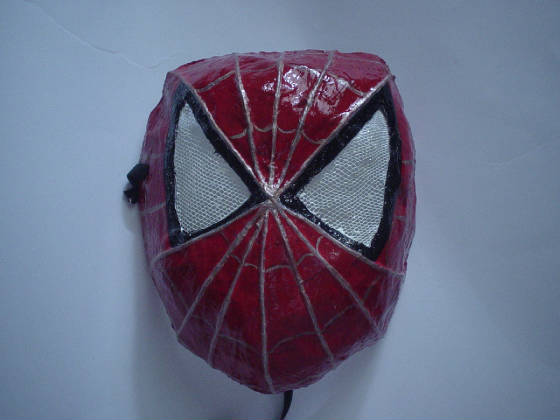
I applied two coats of the red, added two coats of black around
the eye-holes and two coats of silver to the twine to create the web.
For the web between
the twine and around the sides, I used a silver gel pen.
When all was dry, I applied two coats
of PVA glue to the front and inside of the mask.
I punctured two small holes in the nose area, after checking their position
on my nephew's face.
I added elastic by cutting it to a length that would hold the mask securely
plus extra for tying. I cut slits on either side of the mask, threaded the elastic through and knotted the ends, after
checking the fit on my nephew.
| Inside - see the tiny breathing holes? |
|
| Close-up of the eye-holes |
|
THINGS TO REMEMBER:- Ensure that paint and glue are dry before the mask is worn (there should be no smell) and there
is nothing toxic being emitted by the paint and glue, as the mask will be touching the skin and will rest close to the nose.
- When the mask is left to dry, try to position it so that it keeps its shape,
as it tends to spread open when it is wet.
|
|

